
soil moisture sensor calibration
 Soil moisture sensors, or soil volumetric water content sensors, are typically delivered from a manufacturer with a percentage output. This value is often derived from a generic soil probably from the yard where the manufacturer is located. Needless to say, this calibration will be different from your particular soil.
Here, we provide a step-by-step guide on how you can calibrate your soil moisture sensors.
Note that when calibrating your soil moisture sensor, you will need to consider an acceptable level of accuracy. Many researchers calibrate a particular model of soil moisture sensor, for example the TEROS range of soil water content sensors, for each different type of soil or substrate they will encounter (for example, a sandy soil versus a loam soil). However, soil moisture sensors are never exactly the same even if they are the same model or produced from the same manufacturer. This leads to sensor to sensor variation in measurements. Therefore, other researchers calibrate every single soil moisture sensor for each type of soil or substrate they will be measuring.
If you require advice or further assistance with your soil moisture measurements, please contact our soil scientists.
a video on soil sensor calibration
step-by-step guide for soil moisture sensor calibration
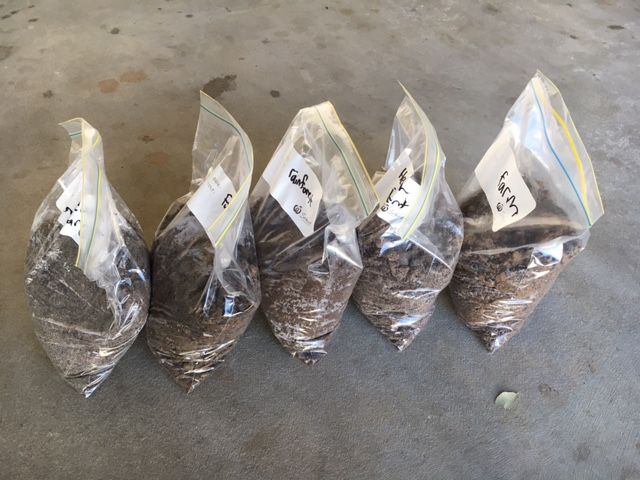
Step 1: Collect soil samples from the field and return to the lab or shed.
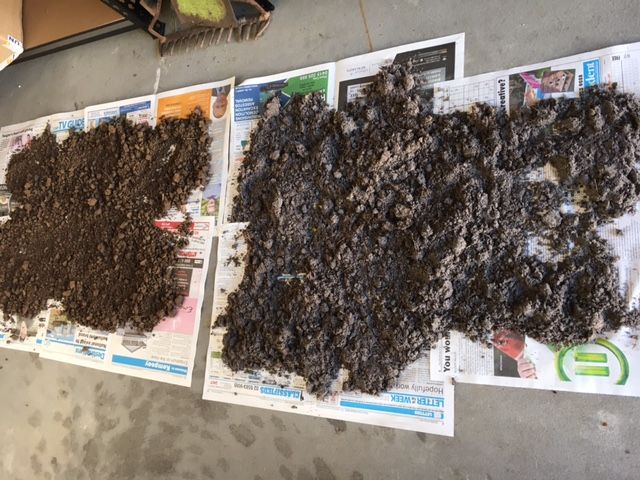
Step 2: Air-dry the soil by spreading the soil samples out across newspaper. Remove any stones, rocks, roots or other unwanted materials. Break down any large clumps of soils. Air drying the soil may take several days to a couple of weeks, depending on the initial moisture content of the soil and how dry/hot the air is in your lab or shed. Periodically turn, or move about, the soil so drying is even across the entire sample.
Step 3: Once soil is sufficiently dry, transfer the soil into plastic containers that are large enough to accommodate the entire length of your soil moisture sensor. For example, the TEROS range of soil water content sensors are 5cm in length, therefore your plastic container should be larger than this, if not at least twice as large.
You should, at the very least, have 3 plastic containers but, preferably, the more containers you have then the more accurate your calibration. In our experience, 10 plastic containers is sufficient for an accurate calibration.
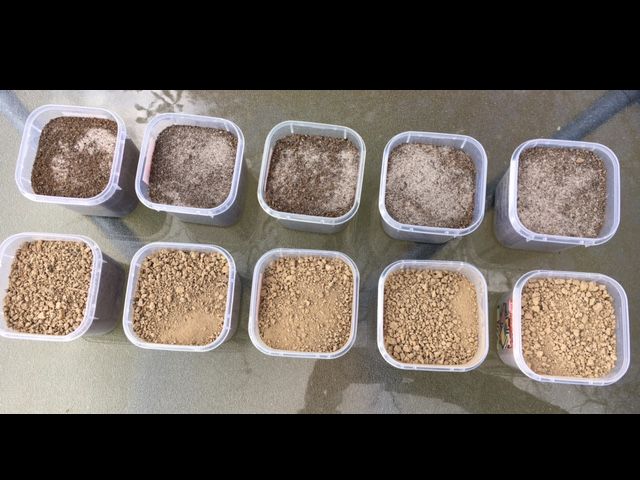
Step 4: Once your plastic containers are full with soil, you will need to create a spectrum of moisture across all of your containers. Leave the first container as the air-dried sample. In the second container, add a small amount of moisture. In the third container, add a bit more moisture, and so on until the last container is full of saturated soil. You can use your soil moisture sensor to check that you have a range of soil moisture from very dry to very wet.
When adding moisture to each container, ensure to thoroughly and evenly mix the moisture through the entire sample. It is critically important that moisture is spread evenly throughout the container and not clumped at the surface or some other location.
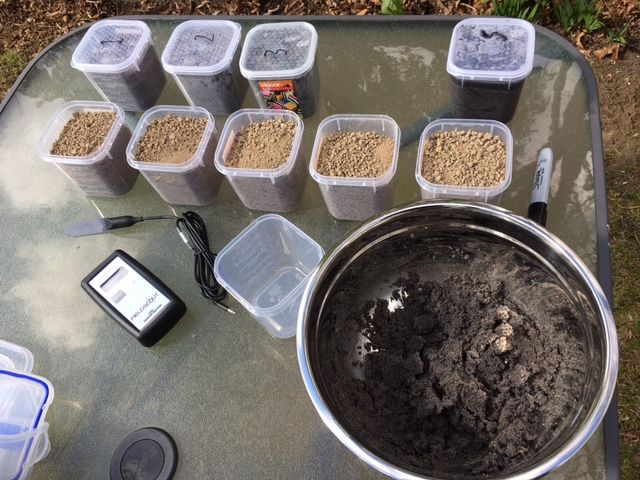
Step 5: In each container, measure the raw millivolt (mV) or count value from your soil moisture sensor. Note this value in your workbook. Typically, the air-dried sample will have the lowest mV value and the saturated container will have the highest mV value.
Step 6: Remove a portion of the soil from each container, one at a time, and weigh this portion on a balance. Note this value as your wet soil weight.
Once you have weighed a portion of soil from all of your containers, place these into a drying over, set at 105 °C, and leave for at least 3 days to oven dry. After 3 days, or when the soil is completely oven dried and contains now more free moisture, remove the samples from the oven and re-weigh. Note this value as your dry soil weight.
Step 7: With the wet soil weight and dry soil weight, gravimetric soil water content can be calculated as:
GWC = (Wet Soil – Dry Soil) / Dry Soil multiplied by 100
Step 8: Many researchers and growers are interested in knowing the volumetric water content (VWC) value. To calculate VWC, simply multiply GWC by the soil’s bulk density.
Determining the bulk density of your soil can be tricky. The easiest approach is to take a field sample of your soil with a stainless steel cylinder with a known volume as demonstrated in the You Tube video, at the bottom of the page, in this weblink:
Other researchers may determine bulk density at Step 3 in the above procedure. In this approach, samples are packed into the containers at a known density similar to field conditions where the soil was first sampled. With this approach, you should consider packing the soil into a steel or tin container, rather than a plastic container, that can then be placed into the oven to dry the soil.
Another approach is to determine soil moisture in the field. This approach is slower than the approach described in the steps above, but it may better reflect field conditions. In this case, with your soil moisture sensor, take a measurement of the soil in the field. Then, with your stainless steel cylinder, take a sample of the soil where you just inserted your sensor. With the soil sample in the stainless steel cylinder, take this back to the laboratory to measure the wet and dry weights as described above. Repeat this procedure at several times, when you know the soil in the field is wetter or drier, so that you have sufficient data to fit a calibration curve.
further information on calibration